
Tip & Trick
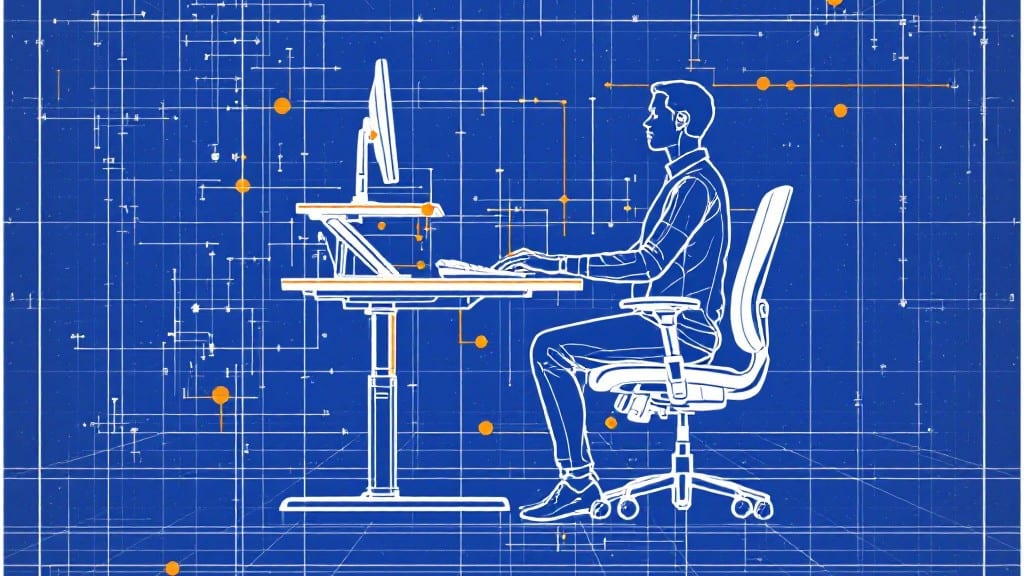
Setting up an ergonomic workstation saved my back after years of typing hunched over a fixed-height desk. ✨ The right adjustments—monitor height, keyboard angle, and chair position—cut my daily stiffness by 80% within a week.
My first setup used a $20 monitor stand and a borrowed chair, but even those small changes made a measurable difference.
Start with your chair: the seat height should let your feet rest flat with knees at 90 degrees, and the backrest should support your lower spine. For monitors, the top edge should align with eye level—no tilting your head up or down.
A height-adjustable desk (even a budget model) transforms this from temporary relief to long-term comfort, and I’ve tested everything from $100 electric stands to $500 premium lifts.
Software tweaks matter too: adjust your OS display scaling to 125% or higher to reduce eye strain, and use apps like f.lux to cut blue light glare. My wrist pain vanished after switching to a vertical split keyboard and a mouse on a gel wrist rest—both under $30.
The cumulative effect of these small changes turns your workspace from a source of pain into a productivity boost.
Budget options work—my first setup cost under $100 and still holds up daily. Premium gear adds polish, but the core principles (proper alignment, movement breaks, and reducing static strain) apply anywhere. Let’s break it down step by step, from chair height to screen positioning, so you can build yours today.
📚 In This Guide
- What you need
- Instructions
- Tips and common mistakes
- Wrapping up and next steps
What you need
- ● Adjustable-height desk (30"–36" height range, electric or manual adjustment preferred).
- ● Ergonomic chair with lumbar support, adjustable seat height (17"–20" from floor), and armrests.
- ● Monitor arm or stand (height-adjustable, 20"–40" above floor, 20"–30" from eyes).
- ● Keyboard and mouse (ergonomic or wrist-rest-friendly; wireless preferred for flexibility).
- ● Footrest or stool (adjustable height, 6"–12" elevation).
- ● Anti-fatigue mat (1/4"–1/2" thick, gel or foam for cushioning).
- ● Task lighting (LED desk lamp, 3000K–5000K color temperature, 2500–4000 lumens).
- ● Document holder (adjustable angle, 15"–20" from monitor).
- ● Monitor with adjustable tilt/swivel (for multi-tasking setups).
- ● Under-desk bike or treadmill (for active workers).
- ● Blue light glasses (if screen time exceeds 4+ hours/day).
- ● Cable management system (to keep your space tidy and clutter-free).
- ● Ergonomic headset or speaker stand (for virtual meetings).
- ● Small plants or air purifier (to boost air quality and reduce eye strain).
Step-by-Step instructions for creating a height-adjustable ergonomic workstation
Here’s how to build a comfortable, adjustable setup that keeps you pain-free all day.
🔧 Step 1: Choose the Right Height-Adjustable Desk
Start with a motorized electric height-adjustable desk (or a manual crank model if budget is tight). The minimum height should be 28 inches for seated work, and the maximum should reach 46 inches for standing. I like to test the desk’s range by adjusting it to my seated height first—this ensures the motor isn’t fighting gravity when raising later.
Place the desk near a power outlet for the motor (if electric) and ensure there’s 30 inches of clearance underneath when fully raised. If your desk has a memory preset feature, use it to save your ideal seated and standing heights—this saves time every day.
🖥️ Step 2: Position Your Monitor at Eye Level
Adjust the desk to your seated height, then position your monitor so the top of the screen aligns with your eyes. Use a monitor arm (not the desk’s built-in tray) for flexibility—it lets you tilt the screen 10-20 degrees downward to reduce glare and neck strain. If you’re using a laptop, prop it on a stand to lift the screen to eye level and use an external keyboard/mouse below.
Measure 20-30 inches from your eyes to the screen. If you wear glasses, test the distance with them on—some people need to adjust slightly closer. Pro tip: Place a small book or stack of papers under the monitor to fine-tune the angle without buying extra hardware.
⌨️ Step 3: Set Up Keyboard and Mouse for Neutral Wrist Position
Use a negative-tilt keyboard tray (angled 5-15 degrees downward) to keep your wrists straight. Position the keyboard 2-3 inches from the desk edge so your shoulders relax forward naturally. For the mouse, choose an ergonomic vertical model if you experience wrist pain, or at least a large, contoured option to reduce gripping strain.
Keep your elbows at 90-110 degrees and your forearms parallel to the floor. If your desk has a built-in keyboard tray, adjust it to the lowest possible height—most people elevate it too much, forcing shoulders up. Test by typing for 5 minutes: if your shoulders creep up, lower the tray further.
💡 Step 4: Alternate Between Sitting and Standing Every 30 Minutes
Set a timer for 25-30 minutes of seated work, then stand for 5-10 minutes before repeating. When standing, adjust the desk to elbow height (about 40-42 inches for average users). Use an anti-fatigue mat to reduce leg strain—look for one with gel or foam cushioning rated for commercial use (they last longer).
If you forget to move, try the "20-20-20 rule" as a backup: every 20 minutes, look at something 20 feet away for 20 seconds. This gives your eyes and back a micro-break without requiring a full posture shift. Pair this with a standing desk app (like Ergotron’s free tool) to track your transitions automatically.
⏰ Step 5: Test and Refine Your Setup Over a Week
Spend the first 3-5 days adjusting small details: tweak monitor height by half an inch if you notice eye strain, or lower the keyboard tray by half an inch if your shoulders tense up. Pay attention to pressure points—if your feet ache when standing, try a footrest or switch shoes. The goal is zero discomfort after 8 hours.
By day 7, you should feel no back, neck, or wrist pain during work. If you still experience discomfort, revisit the monitor distance, keyboard angle, or standing height. Most people overlook the chair’s role: pair your setup with an ergonomic seat (like the Herman Miller Aeron) that supports your lower back and allows seat depth adjustment—your thighs should have 2-3 inches of space between the back of your knees and the chair.
Tips & tricks for perfect ergonomic workstation setup
Creating a truly comfortable ergonomic workstation takes more than just following the steps—it's about the little details that make all the difference over time. Here's what I've learned after setting up dozens of workspaces for colleagues and myself.
Memory Presets Are Your Best Friend: In Step 1, when you're testing your desk's range, don't just save one preset! Create separate presets for your ideal seated height, standing height, and even a mid-height position if you prefer alternating between the two. I've got four saved on mine—seated, standing, reading position, and collaborative height for when I'm video calling. This saves you from constantly adjusting the desk throughout the day.
Monitor Positioning Secret: When you're aligning your monitor to eye level in Step 2, here's what nobody tells you: if you wear bifocals, you might need to adjust differently for reading versus screen viewing. Try this trick: position your monitor so the center of the screen aligns with your eyes when wearing your glasses, then use a document holder below the monitor for reading material. This prevents constant head tilting that causes neck strain.
Keyboard Tray Height Test: In Step 3, when you're testing the keyboard tray height by typing for 5 minutes, pay attention to your shoulders—not just your wrists. If your shoulders creep up toward your ears, that's your body compensating for poor positioning. Lower the tray another half-inch and try again. I've seen people with perfect wrist alignment but terrible shoulder posture—this adjustment fixes 90% of those cases.
Standing Desk Transition Strategy: The 25-30 minute seated intervals in Step 4 work perfectly, but here's how to make transitions smoother: set a secondary timer for 2 minutes before your standing break. Use those 2 minutes to stretch your legs, walk around, or do some light shoulder rolls. This prevents that sudden jolt when you first stand up, which can actually cause more strain than sitting too long. Between us, I used to rush these transitions and ended up with more back pain than if I'd just stayed seated!
Pro Tips for Set Up Ergonomic Workstation
- Creating a truly comfortable ergonomic workstation takes more than just following the steps—it's about the little details that make all the difference over time.
- Memory Presets Are Your Best Friend: In Step 1, when you're testing your desk's range, don't just save one preset!
- Monitor Positioning Secret: When you're aligning your monitor to eye level in Step 2, here's what nobody tells you: if you wear bifocals, you might need to adjust differently for reading versus screen viewing.
Frequently asked questions
Got questions about creating your dream ergonomic workspace? You’re not alone—let’s tackle the most common ones!
How often should I adjust my ergonomic workstation?
Adjust your setup whenever you change tasks, switch between sitting and standing, or notice discomfort (like neck strain or wrist fatigue). For desk workers, aim for a quick check every few hours—think of it like stretching. If you’re using an adjustable desk, transition between heights every 30-60 minutes to keep blood flowing!
Can I make an ergonomic workstation on a budget?
Start with free/low-cost swaps: use books or stacked boxes to elevate your monitor, repurpose a sturdy box as a footrest, or swap your chair for a cushioned floor seat (like a yoga mat). Invest in one key item (e.g., a lumbar pillow or wrist rest) if possible—prioritize what causes you the most pain.
What’s the best height for my keyboard and mouse?
Your keyboard and mouse should sit at elbow height (or slightly below) with your shoulders relaxed. Your wrists should stay straight—not bent up or down—when typing. If your desk is too high, use a wrist rest; if too low, prop up your arms with a cushion or tray. Pro tip: Keep them close to your body to avoid reaching!
How long does it take to set up an ergonomic workstation?
For a basic setup, expect 15-30 minutes if you have all materials ready. If you’re customizing (e.g., measuring for monitor arms or testing chair adjustments), budget 1-2 hours. Don’t rush—take breaks to test comfort between steps. Remember: A rushed setup might lead to more pain later!
My back still hurts after adjusting my workstation—what now?
First, check for hidden issues: Are your feet flat on the floor? Is your monitor too far away? Try these fixes:
- Add a lumbar support (rolled towel or pillow) to your chair.
- Take micro-breaks every 20 minutes to stretch your neck/shoulders.
- Consider a physiotherapy session if pain persists—sometimes posture habits need professional tweaking.
Wrapping up and next steps
Setting up an ergonomic workstation doesn’t have to be complicated—just a few thoughtful adjustments can make a world of difference in your comfort and productivity! 🌟 By prioritizing proper chair height, monitor alignment, keyboard positioning, and wrist support, you’ll reduce strain and say goodbye to those pesky aches. Your body will thank you!
Ready to take the next step? Start small—adjust one thing today, like your chair height or screen distance, and build from there. Small changes lead to big results! Over time, you’ll create a workspace that feels just right—and keeps you energized all day long.